Thursday, July 14, 2011

Scrappy Envelope / Purse

Here is my July workshop that I have written as a tutorial.
I did not end up doing anything at all to do with continuous prairie points!
I will save that for another time.

I am posting the tutorial here and also as a pdf download in google docs which you can get to by clicking on the link on the right under Tutorials.


The dimensions I used to make the envelope / purse you see pictured are 71/2" x 12"


Scrappy Envelope / Purse


Materials:
A rectangular scrap of wool wadding or iron on pellon
A rectangular piece of fabric the same size as your wadding / pellon
Scraps of your favourite fabrics in assorted sizes & shapes
-          Include some selvedge or ribbon & lace to add some interest / texture
2 buttons – as this is a scrappy project I like to use 2 mismatched buttons.
Sewing Machine & Iron
Rotary Cutter, mat and ruler (optional)

Directions:
1.    If using iron on pellon – iron to the wrong side of your lining piece now.
I also like to iron my non iron on wadding together with my lining piece as I find that it helps to keep them together a little and nice and flat and neat ready to sew onto.
This is the Base.


2.    Find a scrap of fabric that is equal to the width of the Base. If you like you can sew 2 or more pieces together to make one piece the right size. It will need to be about 2 “ in length by the width of the Base.


Lay your scrap piece that is 2” by the width of your Base right sides together with the Base to one end, so the fabrics are right sides together and the wadding is on the bottom.
Sew (using your machine) straight stitch across through all layers.
Turn back and press then top stitch ¼” along the edge.


3.    The creative bit.
Using your favourite scraps completely cover the rest of the Base, now layering over the wadding. Overlap your scraps for good coverage and a better finish. I like to iron them in place so I get a good idea of how they will look and so they are nice and flat ready to sew.


4.    Set your machine to zigzag stitch and sew around the edge of all your scraps, leaving where they meet the edge of the Base as you will zigzag the edge of the whole piece later.
You might like to think this stage through a bit to make sure you do not have to go over the same area more than once, as this is a quilt as you go project you will see the stitching on the inside so it does look better if you have not zigzagged over the same spot a few times!


Trim your ends, especially on the lining side as they are more difficult to get to once we have sewn the fold up.


5.    Now neaten up your edges. I use my rotary cutter and ruler for this bit and make sure the top and bottom equal the same and also the sides equal the same measurement.

6.    Fold you Base into thirds so the straight top stitched edge is in the centre. fold the top third back and press the top stitched third down, this is the inside pocket of your envelope purse.

7.    Starting at the bottom left corner zigzag stitch around the rest of the raw edges. You are stitching through all layers now. When you get to the middle where the top stitched edge is go back and forth to reinforce the join before continuing on the rest of the way around – don’t forget to do the same bit of reverse for a few stitches at the join on the other side.
 I I do this bit of reinforcing at the join because this is where the most strain on the envelope / purse will be.


8.   As you go around the raw edge take care to get this neat as this will be visible on your finished envelope / purse. I do my zigzagging just in a little bit from the edge so it doesn’t get all puckered and look messy.


Finish off the zigzag stitch in the adjacent corner from where you began.

9.    Fold down the outer fold of the envelope and press.

10.  Button holes

Firstly choose your buttons. I like to do 2 but this is up to you as 1 will work just as well. As this is a scrappy project you might like to consider 2 mismatched buttons.
Measure your buttons to see what size button hole to make. I do this by wrapping a piece of ribbon around the button and pinning it in place firmly. Remove the button, and keeping the pin in place, measure the distance from the pin to the fold of the ribbon – this is how long your button hole should be.
Remember if you are using mismatched buttons to measure both of your buttons.


Choose an appropriate position for the button holes, I usually place mine about 1/2” in from the edge and go in from the side edge until it looks right.
Sew then open your button holes.

11.  When you have made your button holes you can sew on your buttons ( by hand ) and
Ta Da you’re done!


·         If you are really put off from doing button holes you could try a different sort of closure, Velcro, press stud, magnetic closure whatever you like. I like to do the button holes as it is great practice to do them on a scrappy project where it doesn’t matter if you get them a little bit out of line or the wrong size or something.

Saturday, July 9, 2011

Thrifty Thursday

On Thursday I had the opportunity to do a little thrifty shopping - Yay!

4 Books . 2 Flour Bags . 9 Dress Patterns

All this for the princely sum of $1.00
Possibly my best buy yet!

A few more bargains...


Some Knitting Needles


To add to my collection...


Which is obviously way too many for a girl who can not even knit a purl!
I knit one scarf a year and it has to be in straight knitting - no purl or I get it all muffed up.

Two lovely vintage tablecloths...

Hanging on the line.

and

A sweet little vintage wood toy building set which I could not resist.

Like a little factory or housing estate I think.
Very spiffy!


Fab Find

OMG!!! I felt like I had won the lottery when I discovered this little gem hiding away in a thrift store, just waiting for me to unearth it.

Lapin Collar

I absolutely want to wear this, but just as much I do not want to cut the tag off.
Major dilemma!


Saturday, July 2, 2011

Tuesday Night Workshops

Every Tuesday night I meet with some friends to do some stitching and some bitching, sometimes more of one than the other! We all work on whatever we are into on the day, sometimes stitcheries, knitting, crochet and sometimes just reading magazines.
We celebrate birthday's and Christmas with lots of lovely gift giving and occasionally some of us go away together for creative weekends too.
This year we thought it would be fun if once a month one of us led a little workshop. This has been a great idea and I think very successful. So here are the things we have done...


January
Flour Paste Resist


These are my samples that I have since gone over and highlighted with shiva paint sticks so this is not exactly what the flour paste resist result looks like but if you look at this bottom sample closely you can see the marble vein crackle look in the background and that is the result that we aimed to achieve.

This was a fun to do and I then used the technique I learnt to get the crackle effect on my 'Venice Impressions' art cloth that I made for the Cloth Paper Scissors fabric swap.

The Pear is my favorite and I think turned out really well. I am not sure yet what I might do with it but I think it would look good with some stitching over it.


February
Kusudama


Literally Literary Love Ball - made from a vintage Mills & Boon!


Map Ball - made from an old truckers guide to Britain!

This was my first workshop and I worked everybody really hard to get this ball complete in 3 hours.
There is a lot of folding and gluing but worth it because these look fantastic!
I saw the tutorial for this over at Folding Trees.


March
Bride Charm


This is a very sweet little dove that we made suitable for a bridal gift but I think you could also make these as Christmas decorations too.
I love the little bit of lace for the wing and I especially liked how the lace was stitched down to the felt as a stabilizer prior to cutting the wing shape, it made stitching it to the bird body very easy.


April
Needle Embellishing

In April we used the needle embellishing machine to create a little picture.
These are some of the samples of what we did...


Mermaid on the Rocks


Scottish Highland Scene - apparently I am the only one who sees this!

For these samples I used a piece of acrylic felt and laid out some wool roving's to create a scene, I then used the needle embelisher to attach them to the felt.


This is a sample of attaching slubby wool in coils to a piece of acrylic felt - very effective.


May
Paper Piecing

Paper piecing was quite fun, I had never done any before and surprisingly ( as it involved hand stitching , which I usually avoid like the plague ) I enjoyed it. Although I will admit that I discovered you can also do this on the machine - yay!

This is what I made using the paper pieced blocks...

It is a Table Runner.

June
Needle Punch

I think over a year ago now I purchased the needle punch tool kit intending to have a go but hadn't got around to it - until now, and so glad too as it is cool!

Look what I made..


Mini Notebook cover.
Very cute and very happy with how this turned out.


July's workshop is back to me. Not 100% sure what it will be but I thought I would firstly do a little demo on how to make continuous prairie points and then ... that's the bit I'm not sure about!
Have to wait and see.

Hedgie Quilt

Last year I met a darling baby girl who had the dearest little quilt wrapped around her and I said to myself, Self you must have that quilt! Fortunately for me the sweet childs mother was the quilt designer and also happens to own a fabric shop - The Secret Drawer - so was able to supply me with all I needed to have my very own hedgie quilt - Yay. I did do a small colour change and added a border which differs from the original but I guess that makes it uniquely mine.


So here it is fnished and I have even put a tiny quilt label on it!

Sew Lots

On the June Long Weekend - ( a few weeks ago now ) I had a bit of a sew along at my place.
I devoted 2 days to sew as much as I could and invited some friends to come along and do the same.
It worked quite well, probably could have talked less, but that wouldn't have been much fun now would it?
Anyway, I did manage to make a few things and got some others started which are finished now. And here they are...


Union Jack Bunting


Mug Rugs
I saw the little tutorial for these over at Im just a guy who quilts Bliss Mug Rug Tutorial
It just so happened that I had the Bonnie & Camille Bliss candy bar in my stash so when I happened upon the mug rug tutorial by Ryan I had a bit of a light bulb moment and went "Yes. I will make these". They are lovely and I am happy with how they turned out.


Some sweet little drawstring bags for a baby.
Made from some cutsie fabric a special friend gave me.


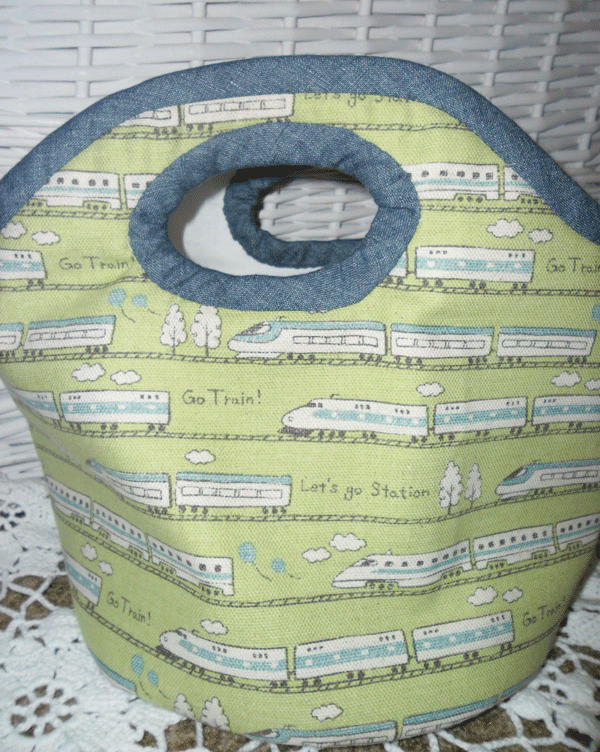
Go Train bag - another gift for a baby.


And yet some more gifts for a beautiful baby, which have now been delivered and I think that Baby B was very pleased to receive all my hand made pressies.